Thank you for your interest in Baycourier software. Let’s start by taking a look at some of
our key features.
To download the pdf version Click here
To download the apk for drivers Click here
Menus

Where to start?
The very first step is to set up your application in the Setting’s tab.
Setting
The Settings tab will help you with following options:
1.
Setting general
parameters for your business

·
Two columns for "Weekend" and "After Hours" will
enable you to set any extra rates you may wish to charge over the selected
service. This way, you will be able to increase your control over the pricing
of these premium services.
·
You can set the price for upgrade to a van, car or wagon, should your client
request one. You can set an extra charge
per pound if the weight of the package exceeds the maximum weight for each vehicle
type.
·
Finally, you can enter your Tax ID number to be
printed on your invoices and the tax.
2.
Printing blank waybills for your customers
3. Adding zones

You can easily create zones by choosing the city you want
the zone to be in. The computer will automatically name the zone the same as
the city. We make it simple for you to
customize zones to suit your business. You
can change the zone name, or add extensions such as "West" and "East," should
you wish to add zones within a city. The
computer program will automatically assign all the postal codes for this city,
which are not assigned to any other zone into this new zone if you leave the
check mark for "Load postal codes for this city".
4. Setting up you
postal codes

·
By selecting the location and the zone and
clicking on "Update" (The first column), our software will show the assigned
and non-assigned postal codes for this zone. You can easily choose the postal
codes and move them between these two lists to set up your favourite zone.
Note: It
is important to follow the following procedure if you like to create a Zone for
one city. As an example, we want to
create two zones for "Mississauga East" and "Mississauga West": Leave the option checked mark during the
process.
A-
Go to "Create Zone" and select Canada, Ontario, and
then Mississauga. The software will assign the name Mississauga to your zone.
Add the word "East" and create "Mississauga East."
B-
Before creating "Mississauga West", let’s go to Zone
vs. Code: select Canada, Ontario, Mississauga,
and then Mississauga East, that we just created and click on "Update". Now you will see all postal codes for
Mississauga are assigned to "Mississauga East".
Select all the postal codes which you would like move to "Mississauga
West" and move to "Not Assigned List".
C-
If you go back to "Create Zone", and create
"Mississauga West", you will see just the remaining postal codes are assigned
to this new zone.
5.
Setting up general Zone to Zone rates

·
Choose the zone which you previously created and
make the rate link by adding your services rate.
6.
Setting up Custom Zone to Zone is a good option, should
you wish to have any special pricing for select customers. This option looks
exactly like General Zone to Zone, but will ask for your customer’s name or
identification.
7.
Setting up Custom General Data. This option allows
you to set up a custom rate for vehicles and weights, as well as the general
rates individually for select customers.
8.
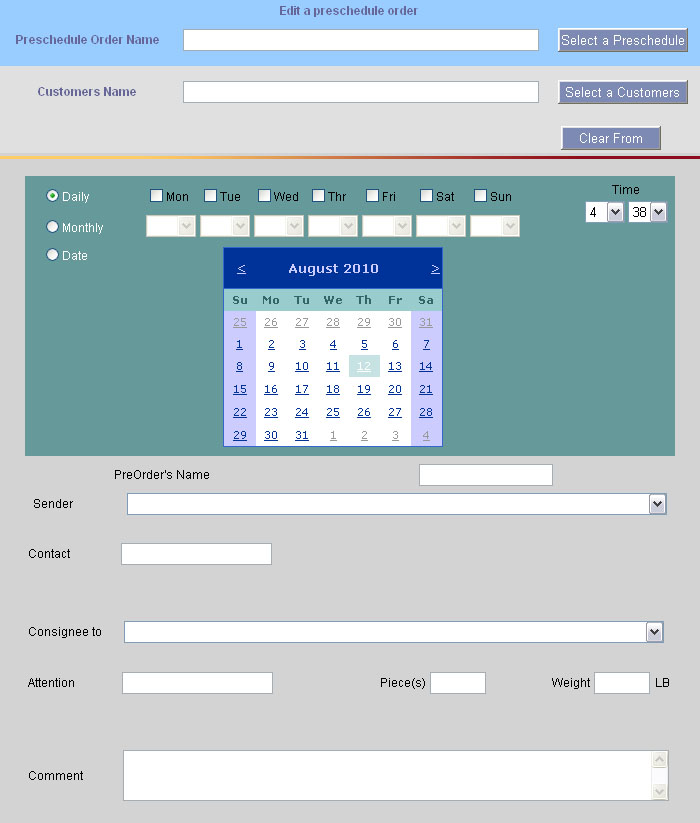
Preschedule Order. This option allows you to set up a
custom rate for vehicles, weights and all the general rates individually for
special customers.
Drivers
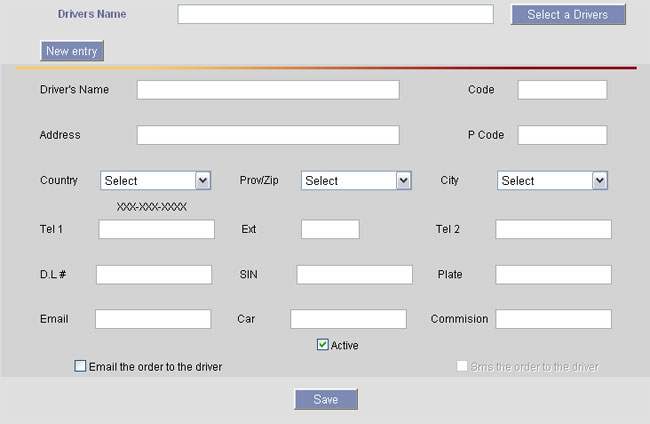
The "Drivers" tab enables you to add, edit or delete your
driver’s information. As a reminder, it is very important to set the commission
for your driver, since this application will calculate everything for you.
The "Email the Order
to the Driver" and "SMS the Order to the Driver" can be used should you wish to
send this information to your driver’s email address or cell phone.
Our application uses
Tel1 to send SMS, so please remember to have the driver’s cell phone number under
this "Tel1" if you are using the SMS option.
Customers
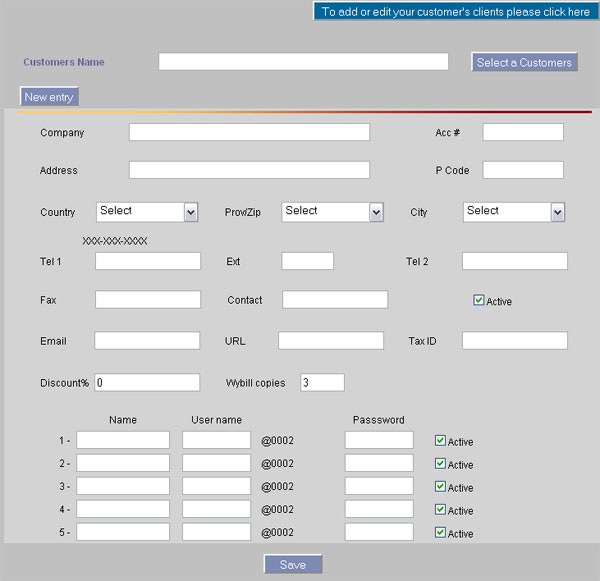
The "Customers" tab will allow you to add, edit or delete
your customers.
As illustrated in
the following picture, this data entry is quite straight forward. You can create up to 5 users per customer, which
will allow them to place their order online.
Clients
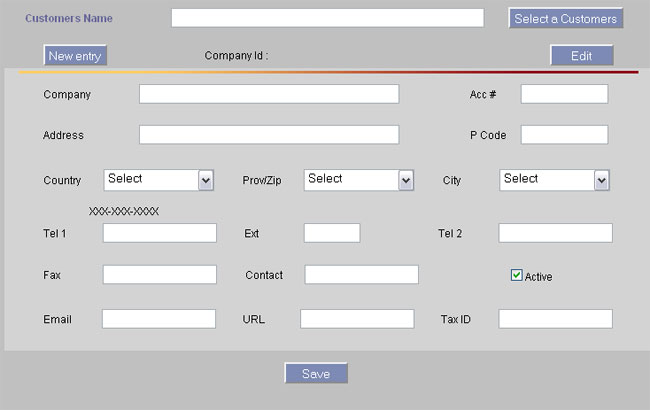
Clients are the
users of your customer’s delivery service. Entering the client’s information will enable
your customers to complete their delivery. The button for this purpose can be
found in the "Customers" tab:

"Clients" page is
very similar to "Customers" page, but with less data entry.
Placing Orders
Customers can
place their orders via the internet, but this tab will assist you should your
customer wish to place their order with you over the phone.
Click on the "Select
a Customer" button and choose your customer.
The application will
automatically load all the clients related to this customer, and you will be
able to choose the locations.
"Docket Number"
is mandatory, but "Contact" and "Attention" may be left blank.
A default value
will be set which is the value of the most popular orders. You will be able to choose the service and vehicle
type.
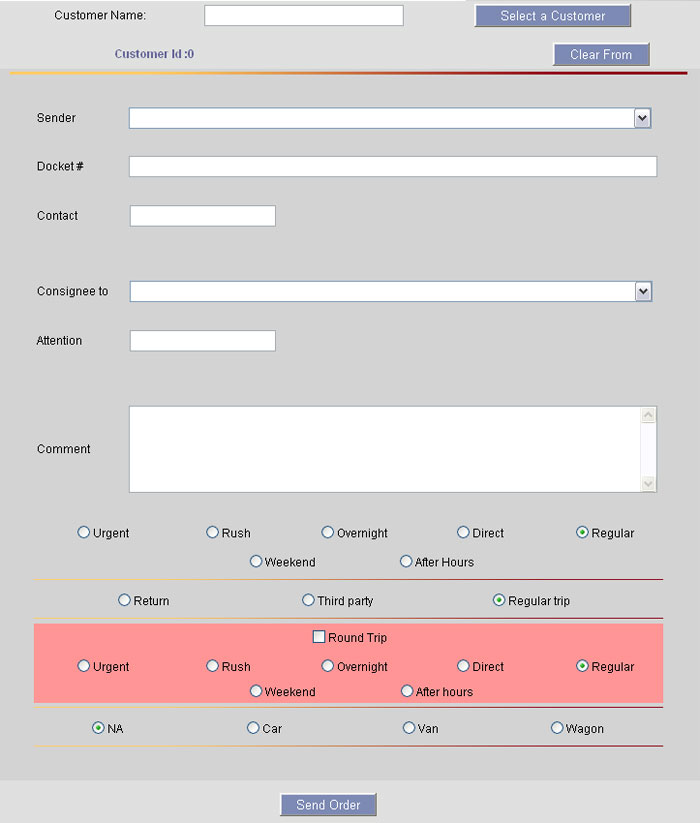
If this is a round
trip order, the application will allow you to choose the service type for the
return trip.
This option is
available in the red box. As soon as the order is sent, the application will
calculate the amount for this order, based on the postal code and zone. An email will be sent to you with pertinent information
relating to the order.
Viewing and Dispatching Incoming Orders
As soon as an order is entered in the system, whether over
the phone by yourself or online via your customer, you will able to view the
order in the "Order" tab as shown in the diagram. Click on "See Details" to
view a detailed account of the order.

As soon as you click on "See Details", you will see the
following window. If this is a new
order, you can select the driver and click on "Dispatch" to change the order
status.
"Pick Up and "Drop" buttons are available for you to change
the status of an order. This will enable
you to keep your customers updated with any changes to their order.
Waiting
Time and Weight
Should you need to make any changes regarding wait times or
the weight of the package, the "Waiting Time and Weight" page will allow you to
do so. The application will update the order’s amount as soon as you apply the
changes and your customer will be able to see this change.
You can change the driver using this page as well.
Note: The
commission will be calculated for the driver that is attached to each order, so
it is important to ensure you have selected the correct driver.
Multi Driver
Should an order
require more than one driver, you will need to use the "Dispatch" button so
that the application will be able to divide the commission for the order. Please remember the "Change the Driver for"
option will change the driver, not add additional ones.
Checking Order Status by Client
Any change you make
to an order will be available for the clients to view online. Therefore, it is
recommended to add the receiver’s name on the note when the package is dropped
off by the driver.

SMS Dispatch
This is an optional feature which will be activated at the
customer’s request. Dispatchers can easily click on "SMS the Order to Driver".
Replying to an SMS: When a driver receives an order, he/she will receive a text message with
an order ID and details about the order.
When he/she picks up the order or drops the order, by responding to that
SMS message, we will create an update email for the dispatcher to notify an update
to the order’s status.
Here are few samples how to respond to an SMS
If the order ID is 20012 and the order was
picked up from John Smith
p20012
John Smith
If the order ID is 2112 and the order was
picked up from Al Yong
d2112
Al Yong
Invoicing
This option is
designed for creating monthly or weekly invoices and statements for you to send
to your customers:
1-
Select the customer
2-
Select the date that you want to run the report
for
3-
The application will show you all the non-
invoiced orders for this date
4-
Select the orders that you want included in this
invoicing period
5-
Click on "Create the Statement" to view your
statement
6-
This statement can be printed or emailed to your
client
Note:
Orders will be tagged as invoiced as soon as the statement is created, so they
cannot be viewed through the "Invoicing" option once you have taken this step.
Receipt
Invoices should be
cleared once your customer has remitted.
The application will mark the invoices as paid through this option:
1-
Select the customer
2-
Select the date that you want to run the report
for
3-
The application will show you all unpaid invoices for this date
4-
Select the invoices which you have received payment
for
5-
The application will show you the total balance
due per invoice. However, should your customer only remit partial payment, you
may enter the amount received, and the application will calculate the outstanding
balance, which will appear on the next invoice.
Payment
This option is
designed for your driver’s monthly or weekly payments:
1-
Select the driver
2-
Select the date that you want to run the report
for
3-
The application will show you all orders for this driver on the date you selected
4-
In case there is any
order which was delivered through two or more drivers, you will see "Multi Driver"
button on front of the order. Here you
can change the assigned commission amount before calculation
5-
Select the orders that you wish included on this
payment
6-
Click on "Create" to view the result
Reports
Under
this tab you can find the following options:
Sales: You can run your sales
report for all dates, a specific date, or a selected customer.
Select the date and the type of report: "Summary"
or "Detail", then click on print.
Waybill: If you wish to
print waybills on your preprinted blank waybill, this option will do the job
for you.
Important: Please remember to set up your waybill size in
the "Settings" tab, under "General Data".
Invoicing, Payment, Receipt:
These three options will allow to view or reprint an invoice that has been
already printed; for your drivers or customers.
You can find this information by
entering the number, (for example invoice number), or search by name or date.


Postal Code Finder: If you are not sure if you have setup a zone
for a postal code or zip code, or should you wish to know the details of a
postal code, this powerful option will provide you with any pertinent details
attached to that zone. You can find an example
in the following diagram:

Zone Detail Report: This report will provide you with a detailed
account of the zones and prices you have set up in your system.
We appreciate you taking the time to read our manual. Should you have any questions or require
further assistance, please do not hesitate to contact us at:
info@baycourier.com or
1-855-MY-BAYCO
(1-855-692-2926)